(8) How to move pictures to another album
Published by marco on
This article is part (8) of a multi-part earthli Albums tutorial.
If you’ve got a lot of pictures in one album and want to group them or categorize them better, you can make sub-albums within the main album. Picking up from where we left off in the navigation tutorial at the Galapagos home page, we see that there are hundreds of photos in one album.
Before you can move pictures, you have to create the album to which you’re going to move them.
To move pictures, you have to switch to the “explorer” view using the drop-down menu, as shown below:
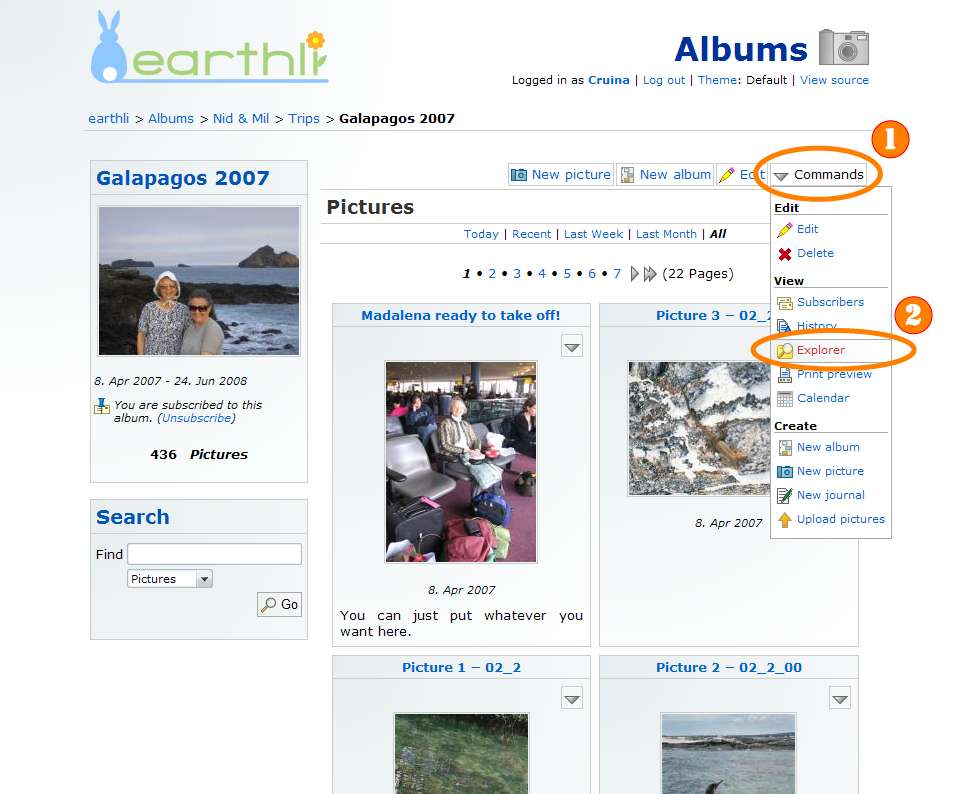 Album Drop-down Menu (click to enlarge)
Hover the mouse over the “Commands” button (1) to show the drop-down menu, then move down and select “Explorer” (2) to show the following page:
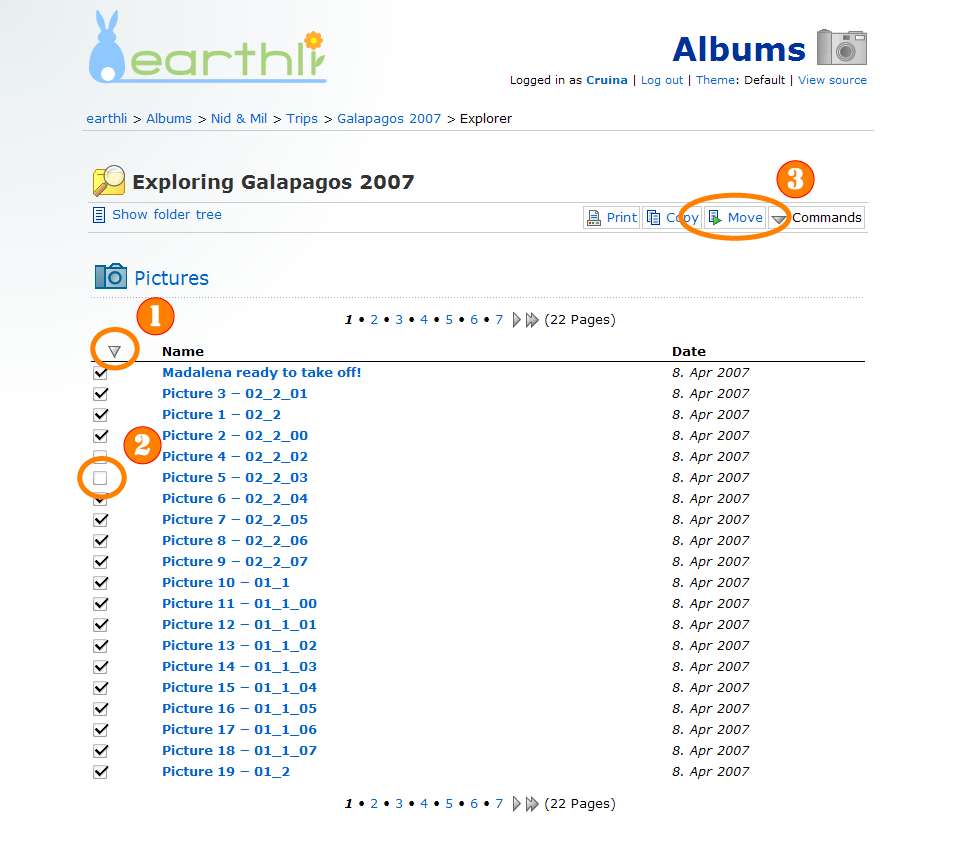 Select Pictures in the Explorer (click to enlarge)
The explorer view lets you perform operations on more than one picture at a time. Check off the pictures (2) that you want to move or use the toggle-all triangle (1) to select/de-select all pictures. When you’ve selected the pictures you want to move, press the “Move” button (3) to show the page below:
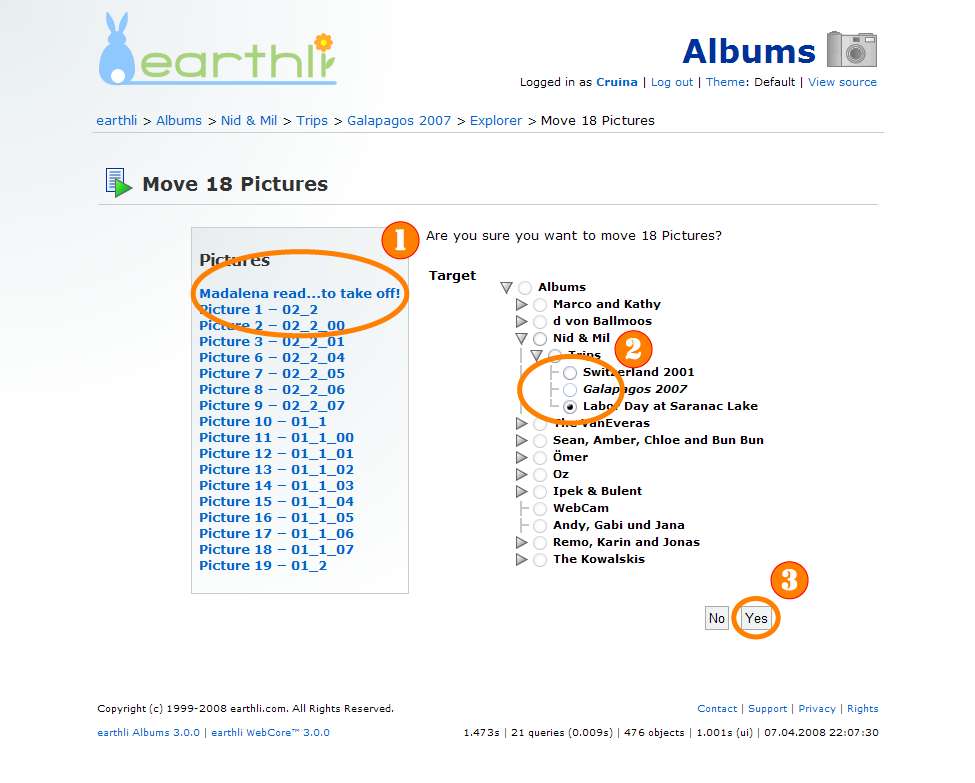 Move Dialog (click to enlarge)
Here, you can see the pictures you selected in the list on the left (1); you should choose the album to which to move them in the tree on the right (2). When you’re ready, press “Yes” (3) to move the pictures.
If you only want to move a single picture, you can access the “Move” operation (1) from the popup menu next to a picture’s thumbnail, as shown below:
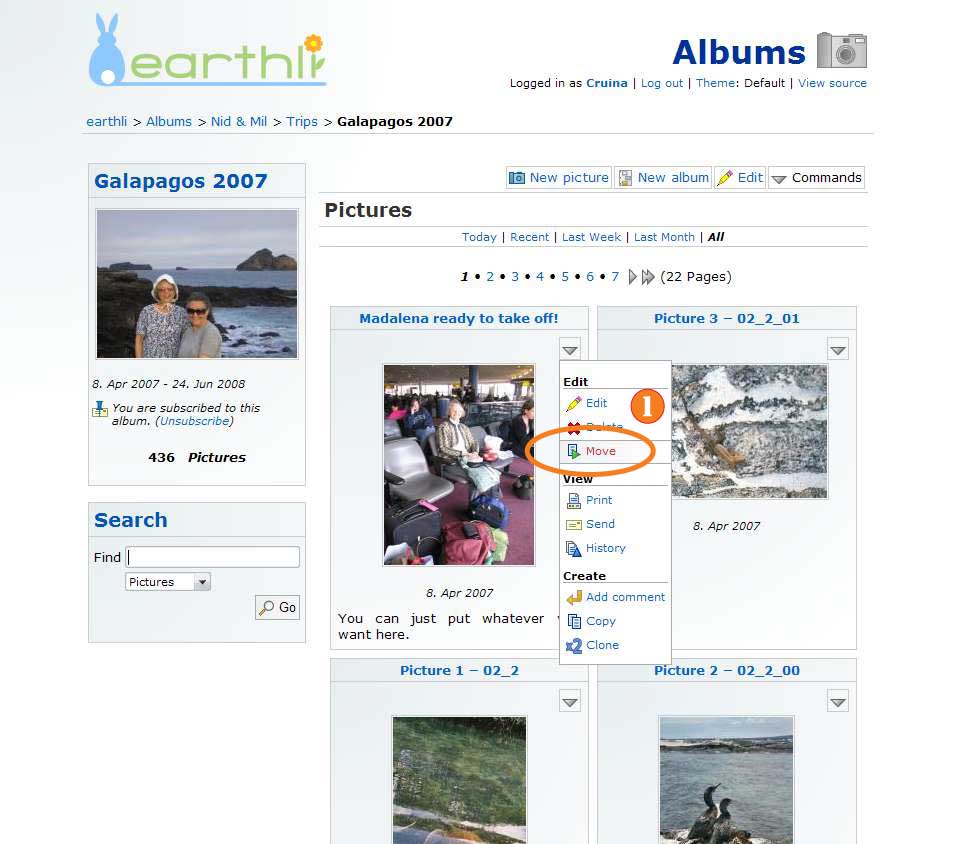 Move Picture from Album (click to enlarge)
The “Move” operation (1) is also available from the “Commands” button on a picture’s home page:
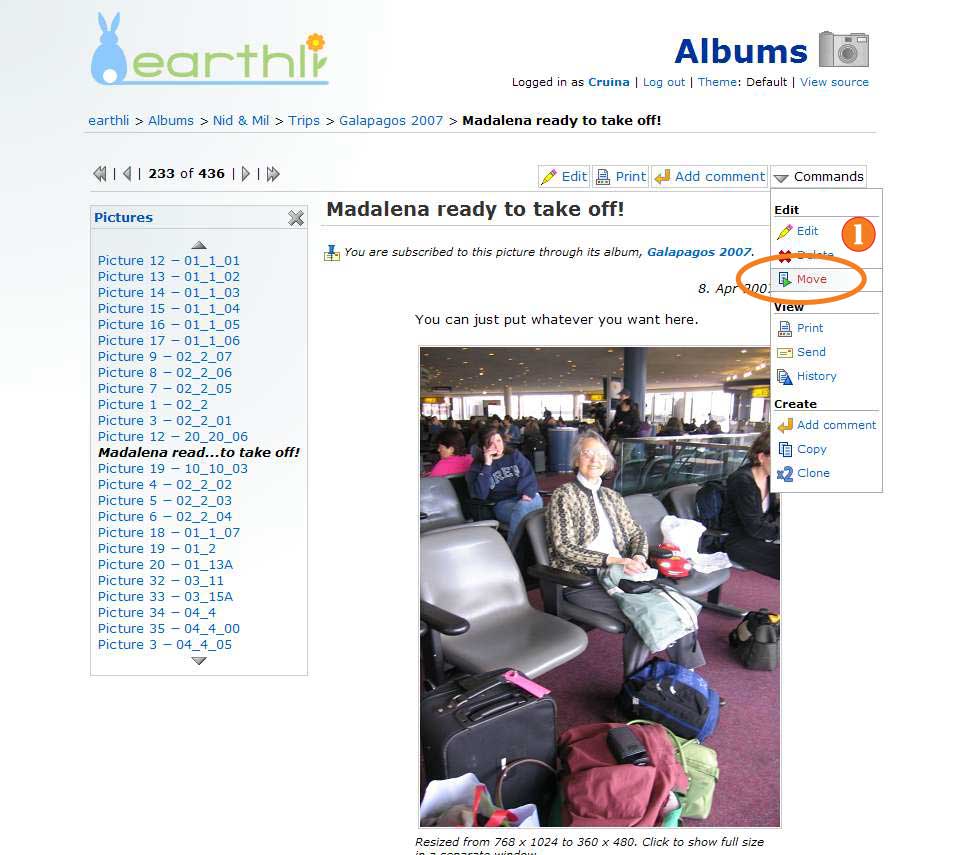 Move Picture from Home Page (click to enlarge)
When you move a single picture, you’ll be taken to the same folder-selection and confirmation page as for multiple pictures (shown above).
Continue on to (9) How to add multiple pictures at once.